Blueberry Lemon Bars

For the longest time I've had this dream of mixing my favorite childhood lemon bar with some berries, just to see what would happen.


When I first tried making these bars, I went the blackberry route. Blackberries are tart and sassy and have a beautiful color. Turns out blackberries are also divas. I don't know. I don't want to talk about it.

The next morning I awoke with a resolve to make my vision come to life. You may call it "way too many lemon bars for a 48 hour time period." I call it redemption.


That's when I sought out the advice of the Grandmother Willow of recipes. The queen of dinner parties.  The one and only.  The Ina Garten.


Together, Ina and I created these blueberry lemon bars. And by together, I mean that I threw some blueberries into Ina's flawless lemon bar recipe that I found on the internet. I know, totally reckless and irresponsible.


These lemon bars are everything. The crust is shortbread basically a bed of sweetened butter. The lemon custard is tangy and sweet and totally ready to party. The blueberries grace these bars like a Ludacris feature in a hip hop song. They take your typical one note lemon bars and add something fresh and sweet. The powdered sugar is just an evolutionary way to kill off people who tend to inhale when they eat.


These bars are perfect for those of you who will let go of summer when it's ripped from your cold dead hands. These bars have summer written all over them.

Blueberry Lemon Bars

Adapted from Ina Garten, Patron Saint of Bruschetta

For the Crust:
2 sticks of butter
1/2 cup granulated sugar
2 cups flour
1/4 tsp salt

For the Filling:
6 extra-large eggs
3 cups sugar
Zest from 2 lemons (about 2 tablespoons)
Juice from 4-5 lemons (about 1 cup)
1 cup flour
8 oz blueberries
1 tablespoon cornstarch

Powdered sugar, for dusting

Preheat your oven to 350 F. Cream the butter and 1/2 cup sugar. Add 2 cups flour and salt and mix until just combined. Dump onto well greased 9X13 inch pan and press with floured hands until flattened. Bake for 15-20 minutes, until just brown around the edges.

While your crust is baking, whisk together eggs, 3 cups sugar, lemon zest, lemon juice, and 1 cup flour.

In a separate bowl, toss blueberries with cornstarch.

Pour lemon filling over baked crust. Pour in blueberries. They should float to the top. Make sure they are spread evenly. Bake in the oven for 30-35 more minutes until filling is set.

Let cool completely (in the fridge is best) before sprinkling with powdered sugar.


Things I Wish I Knew in High School + a Recipe for Chocolate Chip Cookies

As a teenager, I learned pretty quickly that food was my strongest social skill. I've always loved baking, and people tend to warm up to you pretty quickly if you show up with baked goods.


Let me give you a little bit of background on these cookies. I'm not going to say that I wasn't cool in high school, but I am going to say that I once went through a phase where I wore knee-length skirts over boot cut jeans, and let you infer the rest. Anyways, one day, I showed up for a school function with these chocolate chip cookies, and somehow, they became a thing. Like a big thing. Probably the only big thing that happened to me in high school. I got all sorts of requests for these cookies.They would get devoured within seconds whenever they showed up anywhere. These cookies made me at least sort of cool. I made a lot of friends with these cookies.


These cookies. They are everything your dream chocolate chip cookie is. They are soft in the middle, chewy on the edges. They are sweet and salty and vanilla-y. They are blow-your-mind-good and so easy to make.


With the school year around the corner, I wanted to share a few things that I wish high-school-Catherine had known. More importantly, I wanted to share my cookie recipe, because somewhere out there, there is a girl wearing a homemade dinosaur print t-shirt who is about to start high school and I want to give her a little leg up (and because we all need a little help being more cool.)

9 Things I Wish I Had Known in High School:

1. I know you hate having your picture taken, but if you make a silly face in every picture you're in, you're going to have to spend a few solid hours in your early 20's untagging yourself in all those pictures before that cute boy you met finds them on Facebook.

2. Don't be afraid to be yourself. Even if you develop the hobbies of a 70-year-old modern day woman/16-year-old pioneer day woman. Be proud of those ill-fitting clothes you sewed yourself out of that vintage fabric. Display that homemade quilt with pride. The friends you make when you are being true to yourself will be way more valuable than the friends you make when you are pretending to be someone you're not. (And one day, when the apocalypse comes, you'll be warm and well-dressed dressed)

3. It's ok to have a crush on that famous guy, but there is a line that can easily be crossed. I believe that line is somewhere around "designating a drawer in your room to store pictures of the famous guy."

4. You know that sport you always wanted to try, but were too afraid? Well try the heck out of that sport. You'll probably be terrible (at least at first). But you'll have fun being terrible. You'll make new friends. Plus, you probably won't end up roped into that other after school activity that you hate.

5. Always, always be kind. Actions that are less than kind are often the moments you will look back on with regret. Don't do or say things that you will eventually regret, especially to other people. My advice for being kind? Smile as much as you can and think before you speak/act. 

6. It's ok that you fell up the same staircase three times in a row, on the same day, in the same trip. Life will go on. Turn around, give your onlookers a good laugh, and use that story to make friends at parties for the rest of your life.

7. If you don't have self confidence, do everything it takes to get yourself some. Develop hobbies. Make good friends. Wear clothes that make you feel good. Brush your hair, and do your make-up. Treat your body well. Be kind and forgiving to yourself. And pray to whatever higher being you believe in that low rise jeans don't come back into style.

8. It's ok if your beliefs/values are different than everybody else. It really is. Stay true to what you believe. Bonus points if you can take time to learn about, and be respectful of, the beliefs and values of others. 

9. If all else fails, show up with really good cookies.


Make-Friends-With-Anyone-Amazing Chocolate Chip Cookies

1/2 cup sugar
1/2 cup brown sugar (packed tight)
1 stick unsalted butter, cold

1 large egg
1 (overflowing) tsp vanilla

1 1/2 cups flour
1/2 tsp baking soda
1 tsp salt

About 1 cup of chocolate chips

Cream together sugars and butter until smooth and fluffy. Add egg and vanilla.

Mix together flour, baking soda, and salt. Add to sugar mixture.

Stir in chocolate chips. Scoop onto baking sheet and bake 10 - 12 minutes at 350 F

Tips:

Make sure that your butter is straight out of the fridge cold. If for whatever reason, your butter isn't cold, or your mixer isn't strong enough to handle cold butter, be sure to refrigerate your finished dough for at least a couple of hours. Softened butter often leads to flat, crispy cookies.

Salt and vanilla are the two ingredients that give the cookie batter the most flavor. I like to add a tiny bit extra of both to any cookie recipe I make.

I started making these cookies before I knew about the spoon and level method of measuring flour. So for this recipe I typically just scoop the flour with the measuring cup and use the side of flour container to level.

I try to underbake these cookies just slightly. You want them to be golden brown around the edges, with the centers just slightly golden brown on the tops.

The Pizza Crust of Your Dreams


You guys, let's talk pizza. 


I've gotten cozy with a pizza or two in my day. I'm going to go ahead and say that's something to brag about.


I've also made a pizza or two in my day, and over the years I've settled for one mediocre crust after another. I'm talking crusts that are too dense, too sweet, too flavorless. And we can't forget to mention my "whole wheat everything" phase. You guys, pizza is not a health food. It will never be. Let's not kid ourselves. Consider that your intervention.

The worst of all pizza sins is the soggy pizza crust. All you homemade pizzateers (trademark pending) know what I'm talking about. When you pull that gloriously bubbly melted cheese on its miraculously soft bread plate out of the oven, cut that baby up, only to find a soggy gooey mess. Heartbreak, you guys. Heartbreak.


I've found a few ways to combat the soggy bottom pizza. Mostly because I love a good pizza, but also a little bit because I never want to have to say the words "soggy bottom" again in my life ever.

1. Heat up that oven. The best pizzas are cooked in a really hot oven for a short amount of time. This allows the crust to puff up and crisp quickly. I crank my oven all the way up (I mean alllll the way up) and always love the results. If that makes you nervous, try baking your pizza at 425 or 475 F. Just make sure that oven is completely hot before throwing that pizza in there. Some people recommend throwing a naked crust into the oven for a few minutes to let it prebake. I don't have the patience for this, but it might work as well.

2. Up your pizza pan game. Invest in a pizza stone, or my personal fave, a cast iron skillet. This will help your crust crisp up. I like to drizzle a small amount of olive oil on the pan, which is basically like frying the crust and I ain't complainin.

3. Easy on the toppings. Listen, just because you cut up that whole green pepper doesn't mean you need to throw it all on your pizza. Don't sacrifice the pizza for the sake of a vegetable. Instead, plan on using a small amount of toppings (especially toppings like veggies, which have a high water content). In the pizza above, I used about a quarter of a red pepper and a maybe an eighth of an onion (but probably less). If you need to, pat down vegetables TSA style with a paper towel to help get rid of some of the water. As far as sauce goes, make sure you can still see your crust through the sauce. Too much and you'll have piz-soup (prounounced peat soup). Nobody wants piz-soup.

And there you have it! Your pizza will come out of the oven all "I woke up like this" and crispy and bubbly and you'll be all heart eyes. Oprah will tweet about it. World peace will be achieved.


Now that we've got that out of the way. Let's talk about this crust. This crust is everything you want from a cheese bed. It's crispy, chewy, and so full of doughy flavor.  As an added bonus, it is so simple. There is no kneading involved, and it's virtually foolproof (unless you add 2 Tablespoons of salt instead of 2 teaspoons, but that's just a theory, not experience). The only downside with this dough is that, just like George Clooney, it get's better with age. You're going to want to give it a good 12 to 24 hours to really sit and develop. I like to make the dough the night before. Since you just mix up the dough in a large bowl, it's pretty mess-free/stress-free.


#Flawless Pizza Crust
Adapted from Serious Eats

2 1/2 cups flour
2 teaspoons Kosher salt (I've used sea salt and it has worked fine, regular salt might work as well, but I haven't tried it)
1/2 teaspoon instant yeast
1 cup plus 3 Tablespoons water (warm, not hot)
2 teaspoons olive oil (Plus some for drizzling)

Combine flour, salt, water, yeast, and oil in a very large bowl (we're talking as big as you got). Stir until there is no dry flour left. Cover tightly with saran wrap and let sit (on the counter or in the fridge is fine) for 12-24 hours.

When the dough has risen, sprinkle with flour and turn out onto a well floured surface. Separate into two dough balls. If you aren't going to use both, you can throw one back into the bowl, cover, and keep for a few more days.

Drizzle a little bit of olive oil on your pan. Place your dough in the pan and turn to coat. Spread the dough with the tips of your fingers and palms of your hands. Let sit for 2 hours (I let mine sit for about 20 minutes, it didn't puff up as much, but it was still delicious).

Once the dough has rested, pop any bubbles that have formed and preheat your oven. The recipe recommends 550 F. My oven only reaches 500 F and it worked fine. Top your pizza as desired. Remember, less is more.

Bake for 12-15 minutes or until crust is golden and cheese is beginning to brown on top. Let sit for a few minutes before devouring (I know, I know). And there you have it.


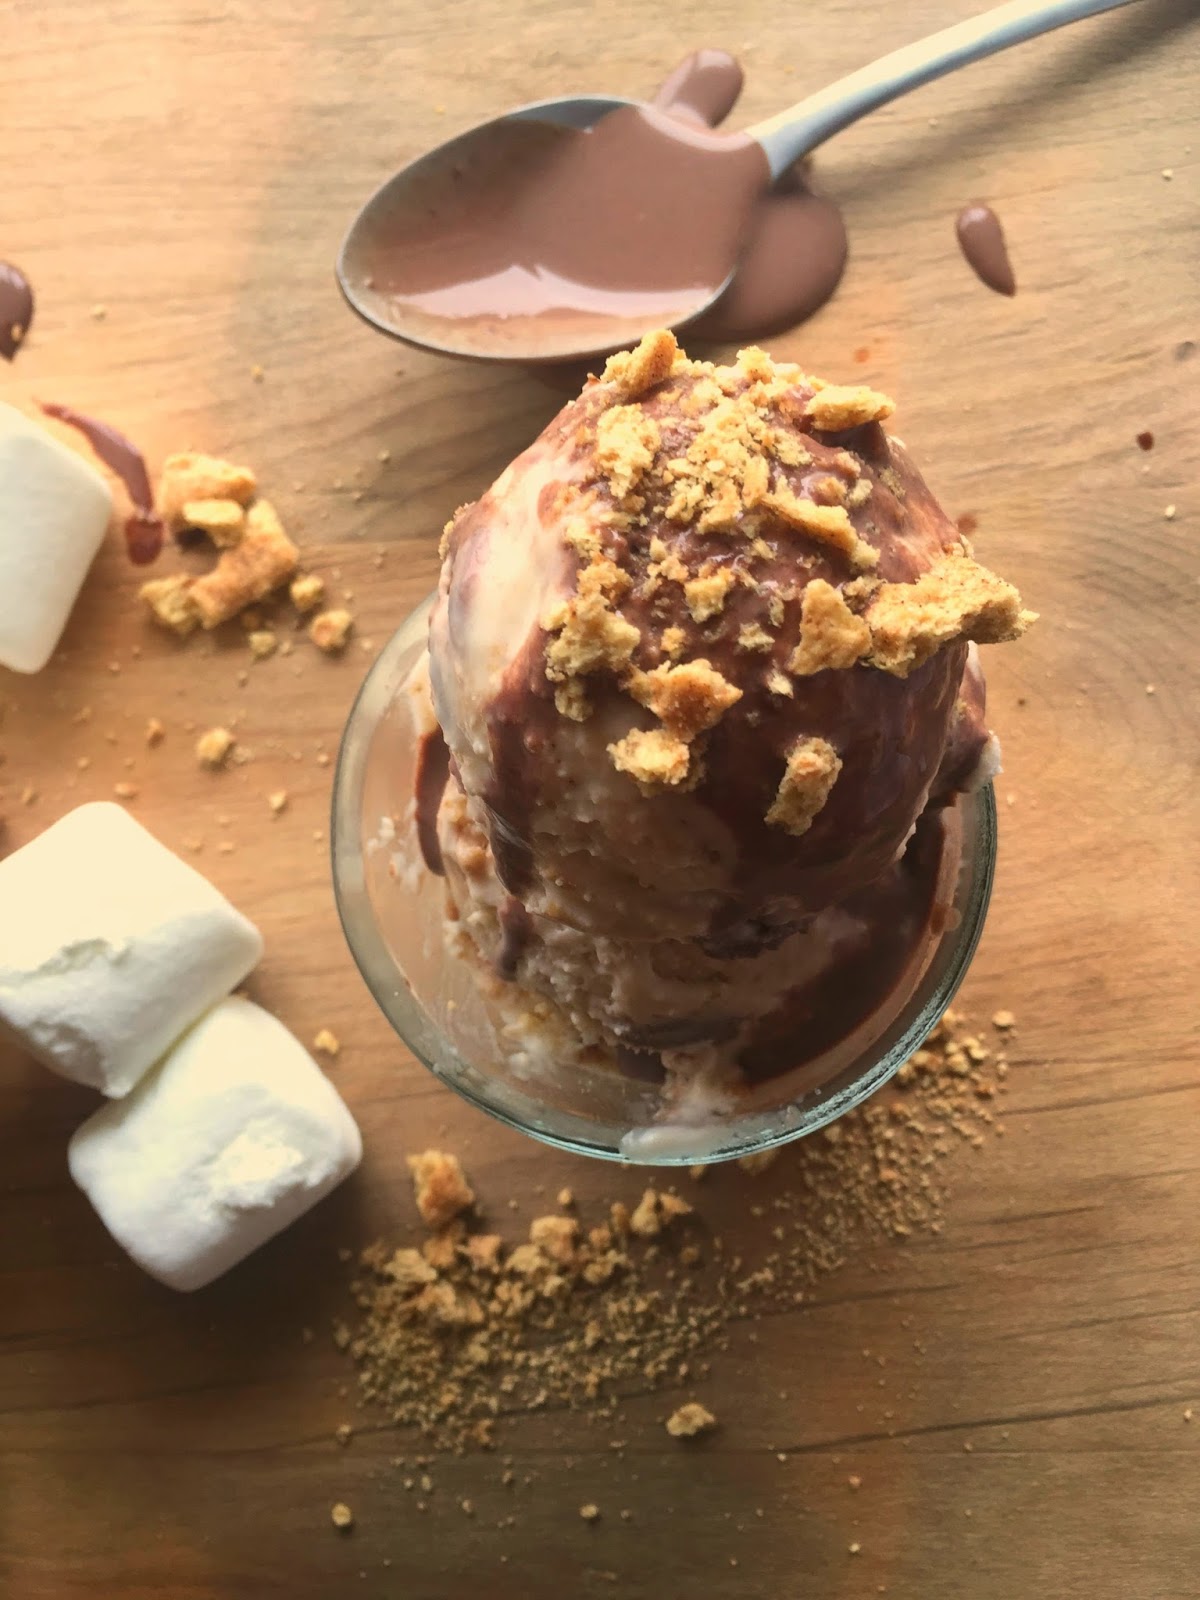
No Churn S'more Ice Cream


A few weeks ago, I threw together this no churn vanilla ice cream and it was so easy and it was so vanilla-y and it was so good. Everytime I ate/faceplanted in that stuff I was reminded of a burnt marshmallow shake from one of my favorite burger joints in DC. And that was how I knew I needed to pretty woman that basic vanilla into a glorious S'More Ice Cream Diva. So I toasted up some marshmallows and threw em in there with some chocolate and graham crackers.


The recipe for the ice cream base is fairly simple. Whipped cream, sweetened condensed milk, and a wholeheckofalot of vanilla. I used vanilla bean paste because it gives it that vanilla bean look without the vanilla bean price.


I was a little nervous about what the marshmallow would do to the consistency of the ice cream, since the basic vanilla base came out so creamy, but it was perfect! This stuff is seriously so creamy and rich. If you're feeling adventurous, you can add anything you want to the base, but I would recommend this s'more combo if you know what's good for you. I also found that the marshmallows made the already sweet base a little sugary, so I had to cut down on the sweetened condensed milk just a tad to make up for it.


After some deep thought and meditation, I ended up using a ganache to make a chocolate swirl. It froze up perfectly, but it added a lot of time and effort. You could definitely chop up some semi sweet chocolate and throw that in instead.


No Churn S'More Ice Cream
Adapted from HowSweetEats


Ice Cream Base

3 cups heavy whipping cream
1 (14 oz) can sweetened condensed milk
1 T Vanilla paste

For the S'mores

12-14 large marshmallows
1 premade graham cracker pie crust
1/2 cup semi-sweet chocolate chips
1 cup cream (See Note Below)

Place the 1 cup of cream in the microwave for about 1 minute, or until bubbles begin to form/just before the cream begins to boil. Pour cream over chocolate chips and whisk until chocolate dissolves completely. Let cool. (See Note Below)

With an electric mixer, whip up the cream to a stiff peak. Do not overmix. Set aside.

Lay out your marshmallows on a baking sheet. Place under a hot broiler until very dark brown to burnt in color (depending on how much burnt marshmallow flavor you want in your ice cream). If the bottoms of your marshmallows have not melted, flip the marshmallows over and broil until melted and crispy. I found that the marshmallows needed to be pretty dark to get maximum flavor per mallow.Be sure to watch your marshmallows carefully. They will brown up fast.

In a medium bowl, mix the marshmallows with the vanilla and 1/2 of the sweetened condensed milk and fold into your whipped cream. It will take quite a bit of folding to get everything incorporated At this point, you may want to taste the whipped mixture to see how sweet it is. You can add more of the sweetened condensed milk to taste. I ended up using about 3/4 of the can.

Fold your pie crust into your whipped cream mixture (you can break it up into smaller pieces, but it will crumble quickly. I like large chunks in my ice cream, so I wanted to break it up as little as possible.)

Pour your mixture into a freezer safe container, Pour desired amount of chocolate mixture over the top and fold just until swirled. Freeze for at least 6 hours (it took about 12 for mine to be completely solid)

Note: For the chocolate in my s'more I decided to use a ganache since it wouldn't freeze solid. I ended up having quite a bit leftover. If you want to save yourself the time/energy/leftovers you could definitely chop up some semi-sweet chocolate and mix that in instead.


Popular Posts